Showing posts with label Social Networking Tips. Show all posts

Friday, 15 February 2013

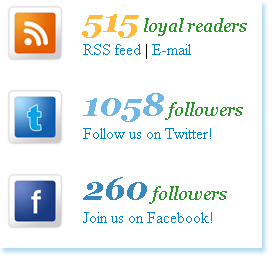
You have seen many mind blowing widgets on wordpress blogs but its now time to make Blogger a better place! Presenting to you just another beautiful and yet useful widget that displays the current number of your blog subscribers, twitter and facebook followers. This widget is based solely on pure CSS and HTML with no JavaScript involved therefore you just need to update the counts manually. At present I am learning programming too so as soon as I develop some good command in programming, I will automate all MBT widgets but at present bear with me as a designer only :p

Take a look on how the widget will look like on a blog with narrow sidebar (The screenshot above is taken on a blog with wide sidebar)

Follow the Steps Below To Add The Follower Counter To Your Blogger Blogs

  1. Go To Blogger > Layout
  2. Choose Add a Gadget or Add a Page element
  3. Select HTML/JavaScript widget
  4. Paste the code below inside it,
<style>
.rss-mbt {
    background: url(https://blogger.googleusercontent.com/img/b/R29vZ2xl/AVvXsEh7lMhDyebM_r8yLB5_rfYuWTKTE5LK3me1QyrcYgZLAtjFYcJxEviWRKhBNHCJO-6qQNA9ckYMP99ZHHIpo0AII0vsBqEKi1avKlw4IorDtSMIvbIWSv3tzJTmPEDDlBpl9TNLMooi74Y/s800/RSS1.png) no-repeat;
    height: 64px;
    padding: 0px 20px 0px 80px;
    margin-top: 20px;
}
.twitter-mbt {
    background: url(https://blogger.googleusercontent.com/img/b/R29vZ2xl/AVvXsEjx7BVgZFdFoSoBg7LHUjrmJq3xYASoCLtmvZuxMB1EvuH0_rBGWjyOYXLP7gX_XwWU9EUcEMlVKb_-5jz5aKTA5mf7TArhPlTXaQ0UVb_y1VdxkQWecsL7nObFg8BQv6AfVtWc3ibEa4Y/s800/TWITTER1.png) no-repeat;
    height: 64px;
    padding: 0px 20px 0px 80px;
    margin-top: 20px;
}
.facebook-mbt {
    background: url(https://blogger.googleusercontent.com/img/b/R29vZ2xl/AVvXsEge5k5CLaFw9Pb076pwV9kjw9JoKXIbLzSeXnCi6EsXO8a6gympuHGL_4cCVYwzywcGWyXmx6rUtJR0n_ULYztoYTr-T5cji2sXynuBzP0KLdTneZkpAsjeq5GN9285I7lCfyJ9jcDH9ko/s800/FACEBOOK1.png) no-repeat;
    height: 64px;
    padding: 0px 20px 0px 80px;
    margin-top: 20px;
}
.follower-rss, .follower-twitter, .follower-facebook {
    font-family: Georgia,  sans-serif, Times;
    font-size: 1.1em;
        font-style:italic;
        color:#289728;
}
.follower-rss span {
    font-size: 1.9em;
    font-weight: bold;
        font-style:italic;
        color:#FFB93C;    
}
.follower-twitter span {
    font-size: 1.9em;
    font-weight: bold;
        font-style:italic;
        color:#6DB6E6;    
}
.follower-facebook span {
    font-size: 1.9em;
    font-weight: bold;
        font-style:italic;
        color:#3889BA;    
}
</style>
<div class="rss-mbt">
<div class="follower-rss"> <span>515</span> loyal readers
</div>
<a href="ADD-RSS-FEED-URL-HERE" rel="nofollow">RSS feed</a>
| <a href="ADD-RSS-EMAIL-FEED-URL-HERE" target="_blank" rel="nofollow">E-mail</a>
</div>
<div class="twitter-mbt"><div class="follower-twitter"><span>1058</span> followers</div>                           
<a href="ADD-YOUR-TWITTER-URL-HERE" target="_blank" rel="nofollow" title="I definitely follow you back">Follow us on Twitter!</a>
</div>                       
<div class="facebook-mbt">                       
<div class="follower-facebook"><span>260</span> followers                            </div>                           
<a href="ADD-YOUR-FACEBOOK-URL-HERE" target="_blank" rel="nofollow">Join us on Facebook!</a>
</div>

NOTE:- Make sure to replace the bolded text with the required details (links of your Feedburner, twitter and facebook accounts) and replace the bolded numbers with your current follower counts. For example replace 515  with your current number of Subscribers, replace  1058 with the number of your twitter followers and replace 260 with the number of your facebook followers
     5.    Save and you are done! Now view your blog to see a stunning widget hanging on your sidebar :D

Customization:

I hope it was not difficult to add :). You can replace the images used in this widget with the image links of your choice.
 Kindly let me know how useful do you find this new stylized widget. I would be more than happy to help you with any query you may have. Take good care of your selves and of your dearest ones. Enjoy! :>

Tuesday, 12 February 2013

Your facebook profile is important for you to know, because the are some cases whereby you want to create a application and you will be required to provide it
 such as adding new facebook comment box to your blog/site, and make sure you use a correct id for you to receive notification directly to your facebook account.


Easily find your Facebook numeric personal ID for fb:admins social plugins and more!


How To Get Facebook Profile Id

  • Open your Browser
  • Type this Addreess http://findmyfacebookid.com/
  • Enter your personal Facebook profile URL: or Fan Page Url
  • Then Click "Lookup Numeric ID"
  • on the next page you will see digits.

Now done you did this this is your Facebook Profile ID.
dding subscription box below your each post is another best way of increasing your blog subscribers. This widget comprises of a subscription box, RSS link, twitter link, facebook link, and google + link. It will appear at the bottom of your post and this is one of the best way to get your readers attention.


How To Add The Subscription Box
  • Go to your blogger dashboard
  • Click on "Design" > "Edit HTML" > Back up your template
  • Mark/Tick "Expand Widget Templates"
  • Use crtl F to find the code below
<div class='post-footer'>

Now paste the code below immediately Before the code above

<b:if cond='data:blog.pageType == &quot;item&quot;'>
<style>
form.feedburner{
margin:20px 0 0;
display:block;
clear:both;
}
.RBstyle{
background:url(https://blogger.googleusercontent.com/img/b/R29vZ2xl/AVvXsEhSAwCGlcDmx0PnbvurQPKbi7-igoTkSBZyj9IL9_8ZQnpqhmtI_gZfomSezgP4YEYn5Ih8wZ_fnuNAI5l-4pq_0T4OpvM_SnT1kTvd-DhRsJ48ZZYG_JQL-Tta0ZcKn_ortpBvsjZ0afW-/s400/email_icon.png) no-repeat scroll 4px center transparent;
padding:7px 15px 7px 35px;
color:#666;
font-weight:bold;
text-decoration:none;
border:1px solid #D3D3D3;
-moz-border-radius: 4px;
-webkit-border-radius: 4px;
border-radius: 4px;
-moz-box-shadow: 1px 1px 2px #CCC inset;
-webkit-box-shadow: 1px 1px 2px #CCC inset;
box-shadow: 1px 1px 2px #CCC inset;
}
.RBsubmit{
color:#666;
font-weight:bold;
text-decoration:none;
padding:6px 15px;
border:1px solid #D3D3D3;
cursor: pointer;
-moz-border-radius: 4px;
-webkit-border-radius: 4px;
-goog-ms-border-radius: 4px;
border-radius: 4px;
background: #fbfbfb;
background: -moz-linear-gradient(top, #fbfbfb 0%, #f4f4f4 100%);
background: -webkit-gradient(linear, left top, left bottom, color-stop(0%,#fbfbfb), color-stop(100%,#f4f4f4));
background: -webkit-linear-gradient(top, #fbfbfb 0%,#f4f4f4 100%);
background: -o-linear-gradient(top, #fbfbfb 0%,#f4f4f4 100%);
background: -ms-linear-gradient(top, #fbfbfb 0%,#f4f4f4 100%);
filter: progid:DXImageTransform.Microsoft.gradient( startColorstr=&#39;#FBFBFB&#39;, endColorstr=&#39;#F4F4F4&#39;,GradientType=0 );
background: linear-gradient(top, #fbfbfb 0%,#f4f4f4 100%);
}

#emailwidget-outer {
-moz-border-radius: 10px 10px 10px 10px;
-webkit-border-radius: 10px 10px 10px 10px;
-goog-ms-border-radius: 10px 10px 10px 10px;
border-radius: 10px;
background: none repeat scroll 0 0 transparent;
border: 1px solid #D3D3D3;
padding: 8px;
-moz-transition: all 0.3s ease-out;
-o-transition: all 0.3s ease-out;
-webkit-transition: all 0.3s ease-out;
-ms-transition: all 0.3s ease-out;
transition: all 0.3s ease-out;
width:480px;
}
#emailwidget-outer:hover{
background: none repeat scroll 0 0 #FFF;
-moz-box-shadow: 1px 1px 2px #CCC inset;
-webkit-box-shadow: 1px 1px 2px #CCC inset;
box-shadow: 1px 1px 2px #CCC inset;
}
#emailwidget-outer td{
padding:3px 0;
}
</style>

<center>
<div id='emailwidget-outer'>
<div id='emailwidget'>
<table style='border:none; margin: 0px 0px 0px 0px; padding: 0px 0px 0px 0px;' width='100%'>
<tbody>

<tr style='border:none; margin: 0px 0px 0px 0px; padding: 0px 0px 0px 0px;'>

<td align='left' style='border:none; margin: 0px 0px 0px 0px; padding: 0px 0px 0px 0px;'> <p style='color:#666; font-weight: bold; font-size: 22px; margin:0px 0px 5px 0px; '>Get free daily email updates!</p>
<form action='http://feedburner.google.com/fb/a/mailverify' class='feedburner' method='post' onsubmit='window.open(&apos;http://feedburner.google.com/fb/a/mailverify?uri=HowToAllToolsTopTutriolsToolsAndTips&apos;, &apos;popupwindow&apos;, &apos;scrollbars=yes,width=550,height=520&apos;);return true' style='margin: 0pt;' target='popupwindow'>
<input name='uri' type='hidden' value='Realcombiz'/>
<input name='loc' type='hidden' value='en_US'/>
<input class='RBstyle' name='email' onblur='if (this.value == &quot;&quot;) {this.value = &quot;Enter your email…&quot;;}' onfocus='if (this.value == &quot;Enter your email…&quot;) {this.value = &quot;&quot;}' type='text' value='Enter your email…'/>

<input alt='' class='RBsubmit' title='' type='submit' value='Submit'/>
</form>
</td>

<td style='border:none; margin: 0px 0px 0px 0px; padding: 0px 0px 0px 0px;'><p style='color:#666; font-weight: bold; font-size: 14px; margin:0px 0px 5px 0px; '>Follow us!</p>
<a href='http://feedburner.google.com/fb/a/mailverify?uri=HowToAllToolsTopTutriolsToolsAndTips' rel='nofollow' target='_blank' title='Suscribe to RSS Feed'><img src='https://blogger.googleusercontent.com/img/b/R29vZ2xl/AVvXsEj4NMSYQEFR39cFQESv2HidKNdl8FeXwqbg61mgQPe115LW7BK9oevoAXPh3JFPHEZDMuumddDjDyY6qb2bD9sT9RWW6p0x1Xi8HzPSFBCC37ugOjFNuBtNEcUOxGptbhiEkD76dZ7enoE/s1600/rss-30×43.png'/></a>

<a href='http://twitter.com/Howtoalltools' rel='nofollow' target='_blank' title='Follow us on Twitter'><img src='https://blogger.googleusercontent.com/img/b/R29vZ2xl/AVvXsEhuLfoEAKypzgM3sIj68w5viMskfGwPaT3nZrQKhWV4AgSH4IrwRqd4gX6ma0XwktefVUUlv70nMEOur1wa5x9u9I8DJs_SMfCZ1aqaQ6czpBy7FVCzRRVyqWdjlwzu7rni-JBgxRz768Y/s1600/twitter-30×43.png'/></a>

<a href='http://www.facebook.com/Howtoalltools' rel='nofollow' target='_blank' title='Follow us on Facebook'><img src='https://blogger.googleusercontent.com/img/b/R29vZ2xl/AVvXsEgWj6fFmLMBApYyMKInHqycT51NLlxH4EY3SmjbZTdN3wZ5NXYLUR_lOdB6HbIcP8i6oUAxcdqs6Jv2J9vmgL0ZBD8mREsgIyb0JUZQd-mBvLfSj46TcYIUET1oBJfQdEo4M7eA9cLB_0U/s1600/facebook-30×43.png'/></a>

<a href='https://plus.google.com/u/0/114198260034907980206/' rel='nofollow' target='_blank' title='Follow us on Google+'><img src='https://blogger.googleusercontent.com/img/b/R29vZ2xl/AVvXsEh-ksBFUQZZaGposNVxtJYsoOFxsUQVwvDbmgy1TN-RdMO-be9694z2o1oswAIP76fjtRV-NeoEYL5NsoC1SM5JRgurhZ4DsDpTkcXJa-IaFwtkMeKJGGqZoJkRFdnssjSM2R8BgxvV9mM/s1600/googleplus-30×43.png'/></a>

</td>
</tr>
</tbody></table>
<div align='right'><span style='font-style: italic; font-size: 8px; color: solid #ffffff;'><a href='http://howtoalltools.blogspot.com/2013/02/add-stylish-subscription-box-with-share.html' style='text-decoration: none;' target='_blank'><font color='#ffffff' decoration='none'>[Get this widget]</font></a></span></div>
</div></div>
</center>
</b:if>
  • Replace http://feedburner.google.com/fb/a/mailverify?uri=HowToAllToolsTopTutriolsToolsAndTips with your your feedburner url
  • Replace http://twitter.com/Howtoalltools with your twitter profile url
  • Replace http://www.facebook.com/Howtoalltools with your facebook page url
  • Replace https://plus.google.com/u/0/114198260034907980206/ with your google + profile url
  • Click "SAVE TEMPLATE"
Hope you love this eye-catching subscription box? share your view about this. Don't forget to subscribe and share this post.